Alone
Each circle is one trigger and one channel of OUT. With a single trigger left, the whole black area is its button.


- Pulse the small mark at the top left: pulse mode on or off
- Triggers click to fire or light; drag across for several
- Shift-drag up adds triggers, down removes them: one to sixteen, eight to start
- IN a poly cable, one channel per trigger
- OUT the triggers, one channel per trigger
Pulse mode is on to start: its mark at the top left of the screen is lit, and a click on a circle fires one trigger, 10 V for 1 ms, on that channel of OUT. With pulse mode off (its mark dark), each circle is a toggle: a click lights it and its channel stays at 10 V until clicked again. Nothing is high only while held. Turning pulse mode on clears the lit triggers.


A poly cable into IN takes over the triggers, one channel per trigger, and a click does nothing while it is in. In pulse mode, IN turns gates into triggers, one as each gate rises; with pulse mode off, the gates pass through. Pull the cable and the pattern you set comes back.
Bonded
Atomic modules pushed edge to edge bond into one rig. A bonded TRG's circles are always toggles; the pulse mark is gone. Its own OUT gives the lit triggers as steady gates, a channel each, whatever a SEQ is doing.
A trigger sequencer
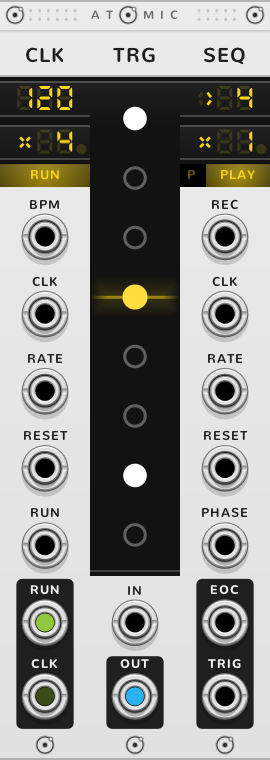
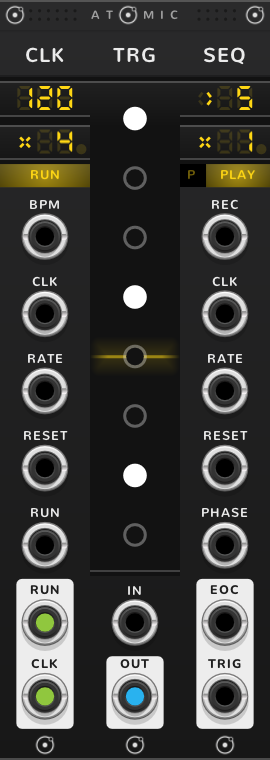
To the left of a SEQ, each trigger of a TRG is a step. The SEQ's OUT, labelled TRIG, fires a 1 ms trigger as the playhead lands on a lit one. To build a five-step pattern, Shift-drag the TRG down to five triggers and click the steps you want to hear. A sequenced TRG gives triggers only, never gates; for a gate as long as a step, let the SEQ step CV faders set to 0 V and 10 V instead.
For two patterns of different lengths on one clock, bond a CLK, a TRG of five, a SEQ, a TRG of seven and a second SEQ: each SEQ steps the TRG nearest its left, and the two drift against each other, meeting again every 35 steps.
Turn on the SEQ's poly steps, the small P square left of its mode button, and each TRG becomes one step; its lit triggers come out together, one channel per trigger, on the SEQ's poly OUT. A row of TRGs then plays up to sixteen drum tracks at once. For a drum pattern, bond four TRGs of three triggers each to the left of the SEQ, with poly steps on. Each TRG is now a step: in each, light the first trigger for a kick on that step, the second for a snare, the third for a hat, and split the SEQ's OUT with any split module into three cables, one per drum.
Fed by a POLY
A POLY with a cable in its IN splits that cable onto the TRGs to its right, one channel per trigger. A trigger you click then stops following the POLY until you double-click it.
Cables on the triggers
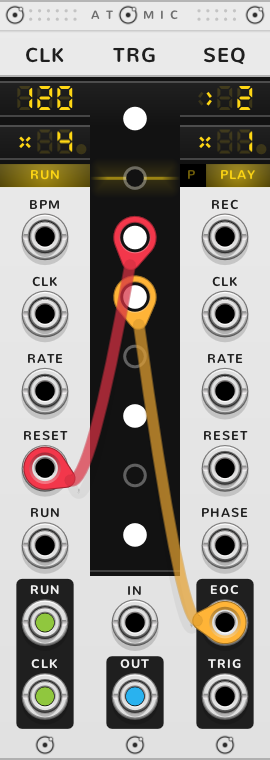
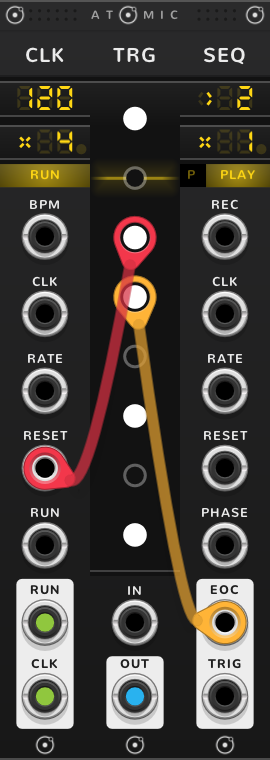
Every trigger is a jack too, an input and an output at once. ⌘*-drag from a circle to patch a cable out of that trigger; the Atomic menu opens only over a module's title, so holding ⌘ over a circle leaves it free for the drag. Drop a cable from an output onto a circle and it drives that trigger; drop one from an input and the trigger feeds it.
A cable into a trigger works it at each pulse, as a click does. Bonded to a SEQ, a cable out of a trigger fires each time the playhead reaches it, lit or not, so a trigger can reset a CLK or a SEQ at a chosen step; with poly steps on, it fires when the SEQ steps onto its TRG with it lit.
Shortcuts
| Where | Gesture | What it does |
|---|---|---|
| Triggers | Drag across | light or clear the triggers (in pulse mode: fire them) |
| Triggers | Shift-drag | add or remove triggers |
| Triggers | Shift+⌘-click | invert all the triggers |
| A trigger | ⌘-drag | patch a cable from this trigger |
| A trigger | Drop a cable | patch this trigger |
| A trigger | Right-click | its cables |
| Triggers, poly steps | Shift-drag | size all the SEQ's TRGs |
| A trigger set by hand while a POLY feeds it | Double-click | follow the POLY again |
| Pulse | Click | pulse mode on or off; on clears the pattern |
On every module
| Where | Gesture | What it does |
|---|---|---|
| A value on a screen | Double-click | back to its default |
| Any part | Rest the pointer | a tooltip explains it |
| A module's title | Hold ⌘ or Alt | the Atomic menu: change this module into another kind, or insert one beside it |
| The Atomic menu | Shift+⌘-click | delete the module |
| The bracket | Delete | remove the whole rig |
| The bracket | ⌘-D or Alt-D | duplicate the rig; with Shift, its cables too |
| ATOMIC on the bracket | Click | it reads RESET under the pointer, and starts every SEQ and CLK of the rig again |
* ⌘ is Ctrl on Windows and Linux.